Last Updated: 2020-03-10
In addition to in-circuit virtualization with Avatars VBB also has limited support for fully virtual circuits when getting started. The virtual ATmega328p component is an instruction-set simulator with support for DIP and Arduino UNO footprints. HEX files output from the Arduino IDE can be loaded and simulated in VBB by dragging and dropping the HEX file onto Arduino UNO.
What you'll build
In this codelab, you're going to use a Virtual Arduino UNO to blink a LED using the HEX output of the Arduino IDE
What you'll learn
- How to Open an Arduino Sketch
- How to Save a Sketch folder on your computer
- How to locate the Sketch Folder on your computer
- How to select the Arduino/Genuino as your board
- How to generate the HEX file to simulate
- How to place a Virtual Arduino and LED to create a test circuit
- How to verify the Virtual Arduino is configured to run a HEX file
- How to program the Virtual Arduino by dragging and dropping a HEX file onto the Virtual Arduino
- How to run the Virtual Test circuit by pressing the Power On button
- How to update the Virtual Arduino program during runtime by dragging and dropping an updated HEX file
What you'll need
- Virtual Breadboard App
- Arduino IDE
In this codeLab we will use the Blink Sketch example that is shipped with the Arduino IDE. You can skip this section if you already have a Sketch you are trying to simulate.
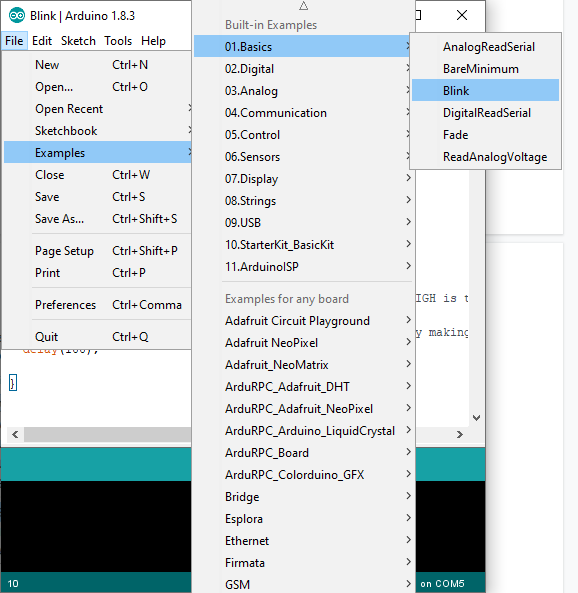
To open the Blink Sketch::
- Select the Menu File⇒ Examples⇒ 01.Basics⇒ Blink
Saving the Blink Sketch
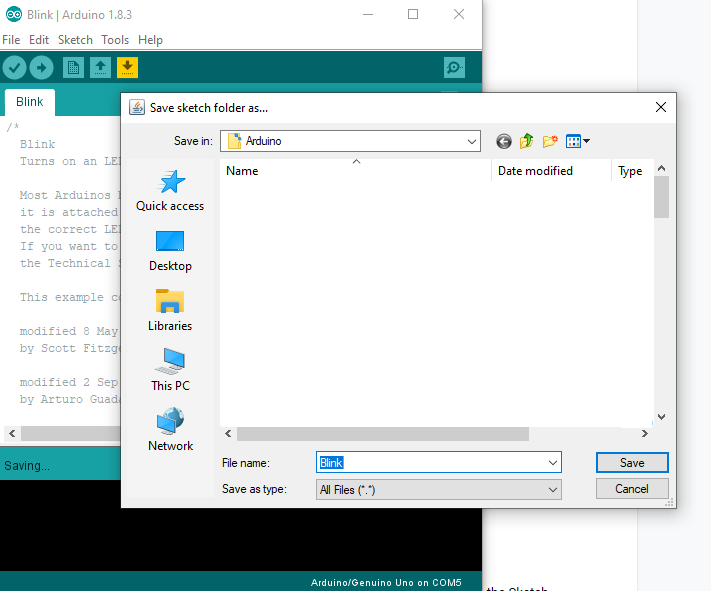
The Arduino IDE examples don't allow you to make changes to the Sketch or generate HEX files into the examples Sketch folders so you will need to save the Blink Sketch into your personal Sketch folder or other location.
To save the Blink Sketch::
- Select the Menu File⇒ SaveAs
- Use the file save dialog to save the Sketch to your prefered location
Show Sketch Folder
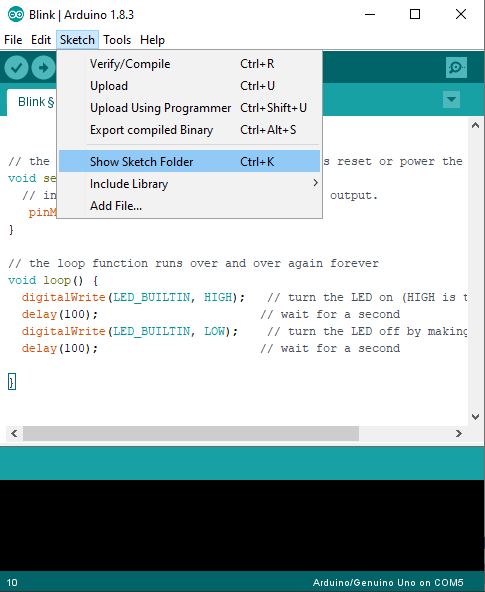
All the files for a Sketch are included in a Sketch folder. We will be dragging and dropping the HEX file output from this folder so you need to open it so we can access the files using explorer
To show the Sketch Folder:
- Select the Menu Sketch⇒ Show Sketch Folder
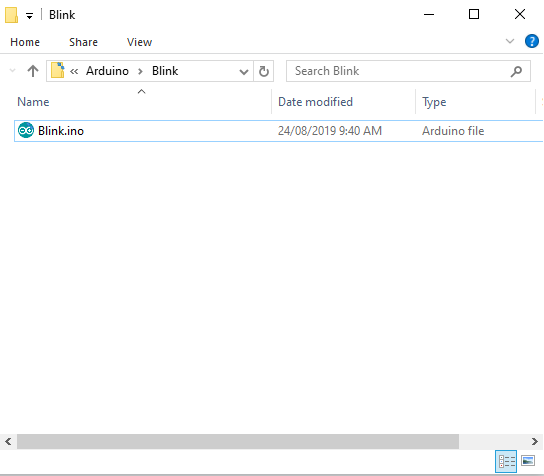
You should see the Blink Sketch inside the Blink folder shown by a Windows Explorer folder
The Arduino IDE is a simplified build system for the gcc compiler. If you are very new to Arduino you might not be familiar with the idea that the output of the Arduino IDE is a HEX file. The HEX file itself is just a hexadecimal encoded version of the raw binary instruction set program that the microcontroller will actually run.
With a real arduino the HEX is transparently sent over a serial port to the microcontroller to self program so normally you don't see the HEX file. In VBB though we pass the HEX directly to the virtual microcontroller as a File and then VBB decodes the file and executes the binary so we need access the HEX file itself.
Setup the Board
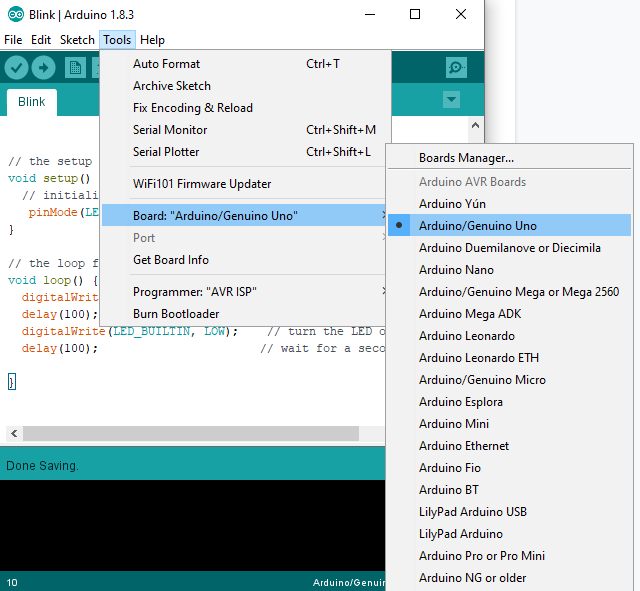
VBB only virtualises the ATMega328p microcontroller so you need to make sure the correct board is setup in the Arduino IDE to generate the correct HEX. You should choose the Arduino/Genuino Uno board
To show the Sketch Folder:
- Select the Menu Tools ⇒ Board ⇒ Arduino/Genuino Uno
Export the HEX
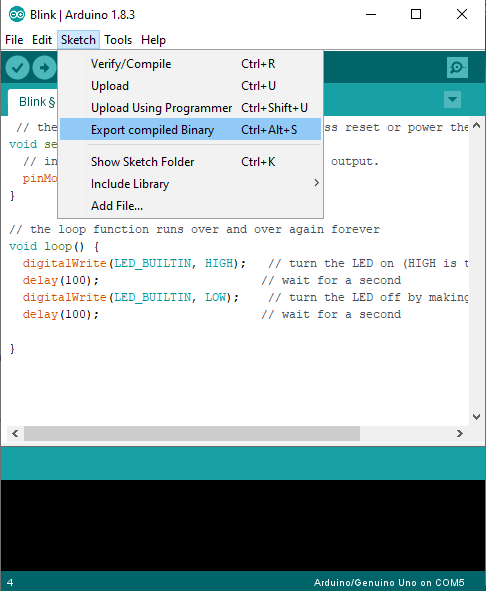
With the correct board selected it is easy to generate the HEX file from the Arduino IDE.
To generate the HEX file:
- Select the Menu Sketch⇒ Export compiled Binary
Locating the HEX
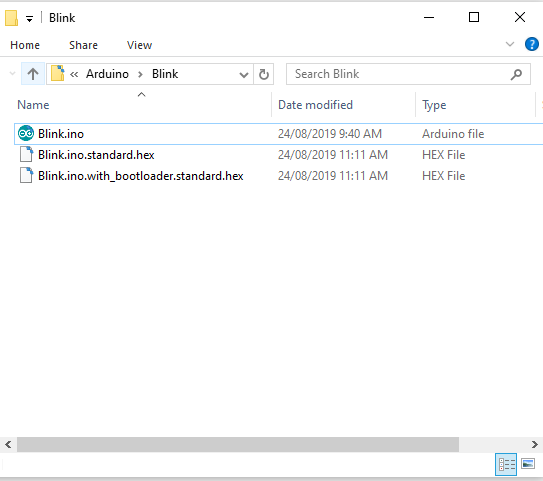
Once compiled the HEX file should now appear in the Sketch folder. The file we will work with ends with ._standard.hex
To run the HEX in simulation only mode you need to use the ATmega328p component with the Arduino UNO footprint i
Create Test Circuit
The ATMega328p co-processor is the same microcontroller as used by the standard Arduino UNO. By default it is configured to execute HEX files so it's easy to create a project from scratch to run simulations of your Arduino code.
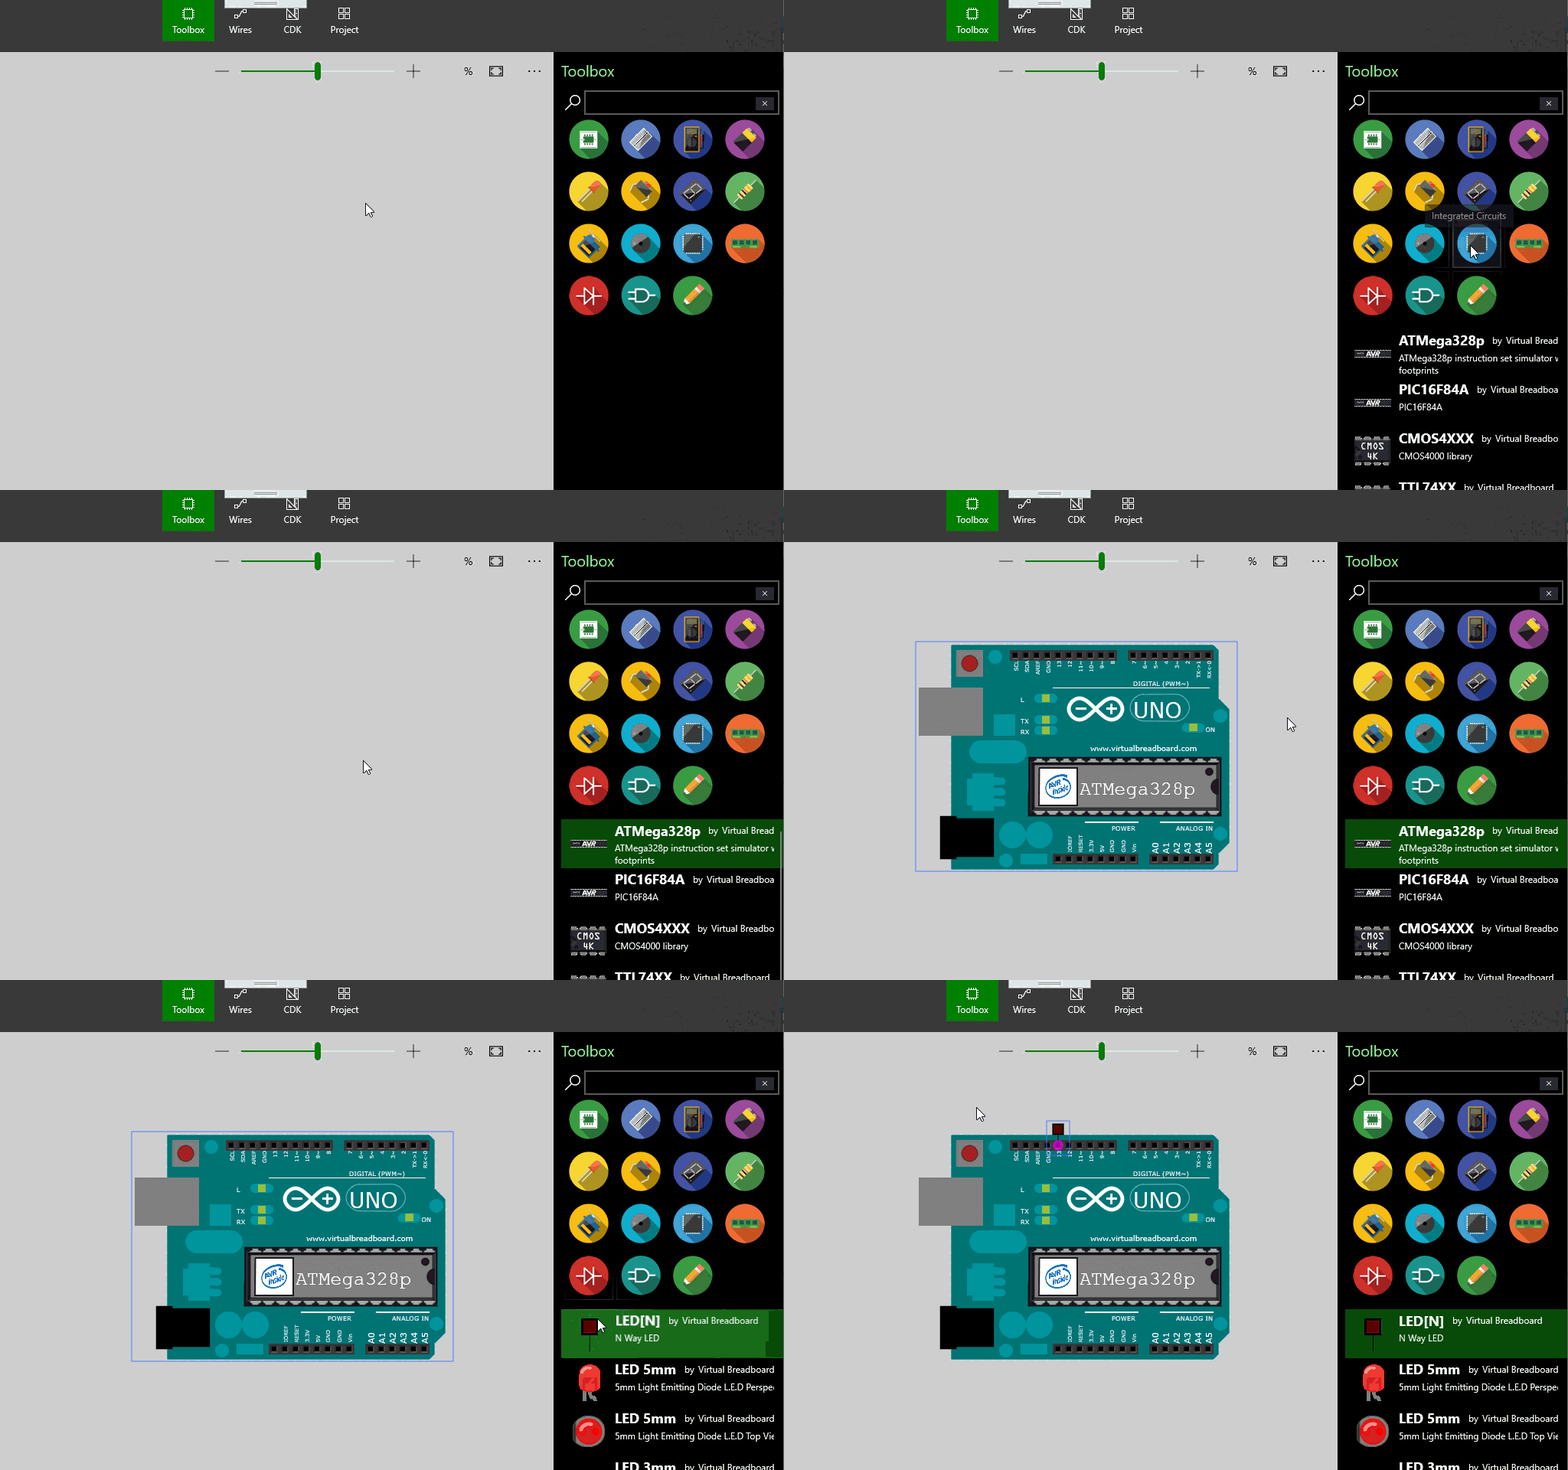
To create a Test Circuit for the Blink HEX :
- Start a new VBB Project
- Place an ATmega328p Arduino UNO
- Place an LED on Pin 13
The Virtual ATmega328p needs to have a program to run. When a real Arduino is programmed it stores the binary program to Flash. The virtual ATmega328p stores the last programmed firmware in the HEX property as part of the project and so in this way acts like the real ATmega328p.
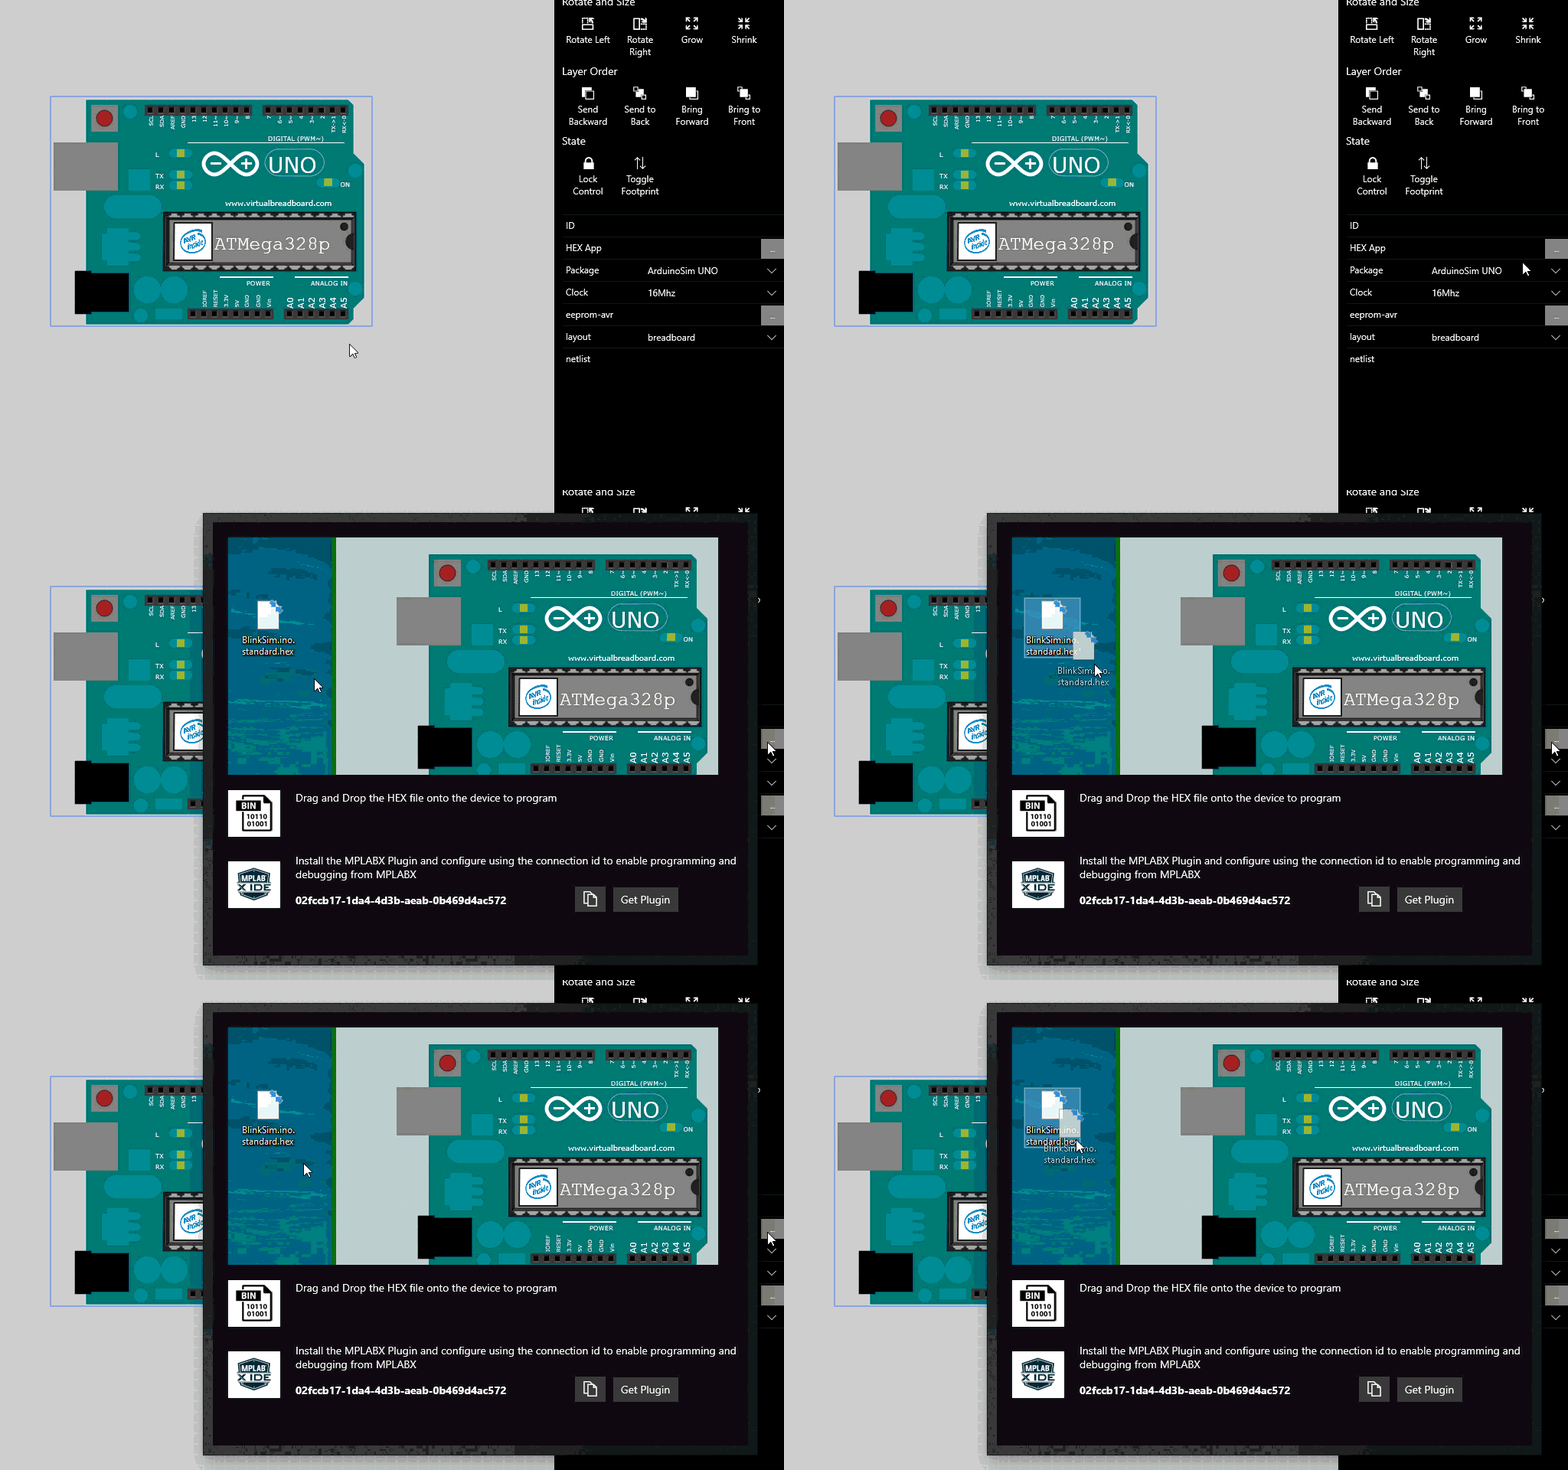
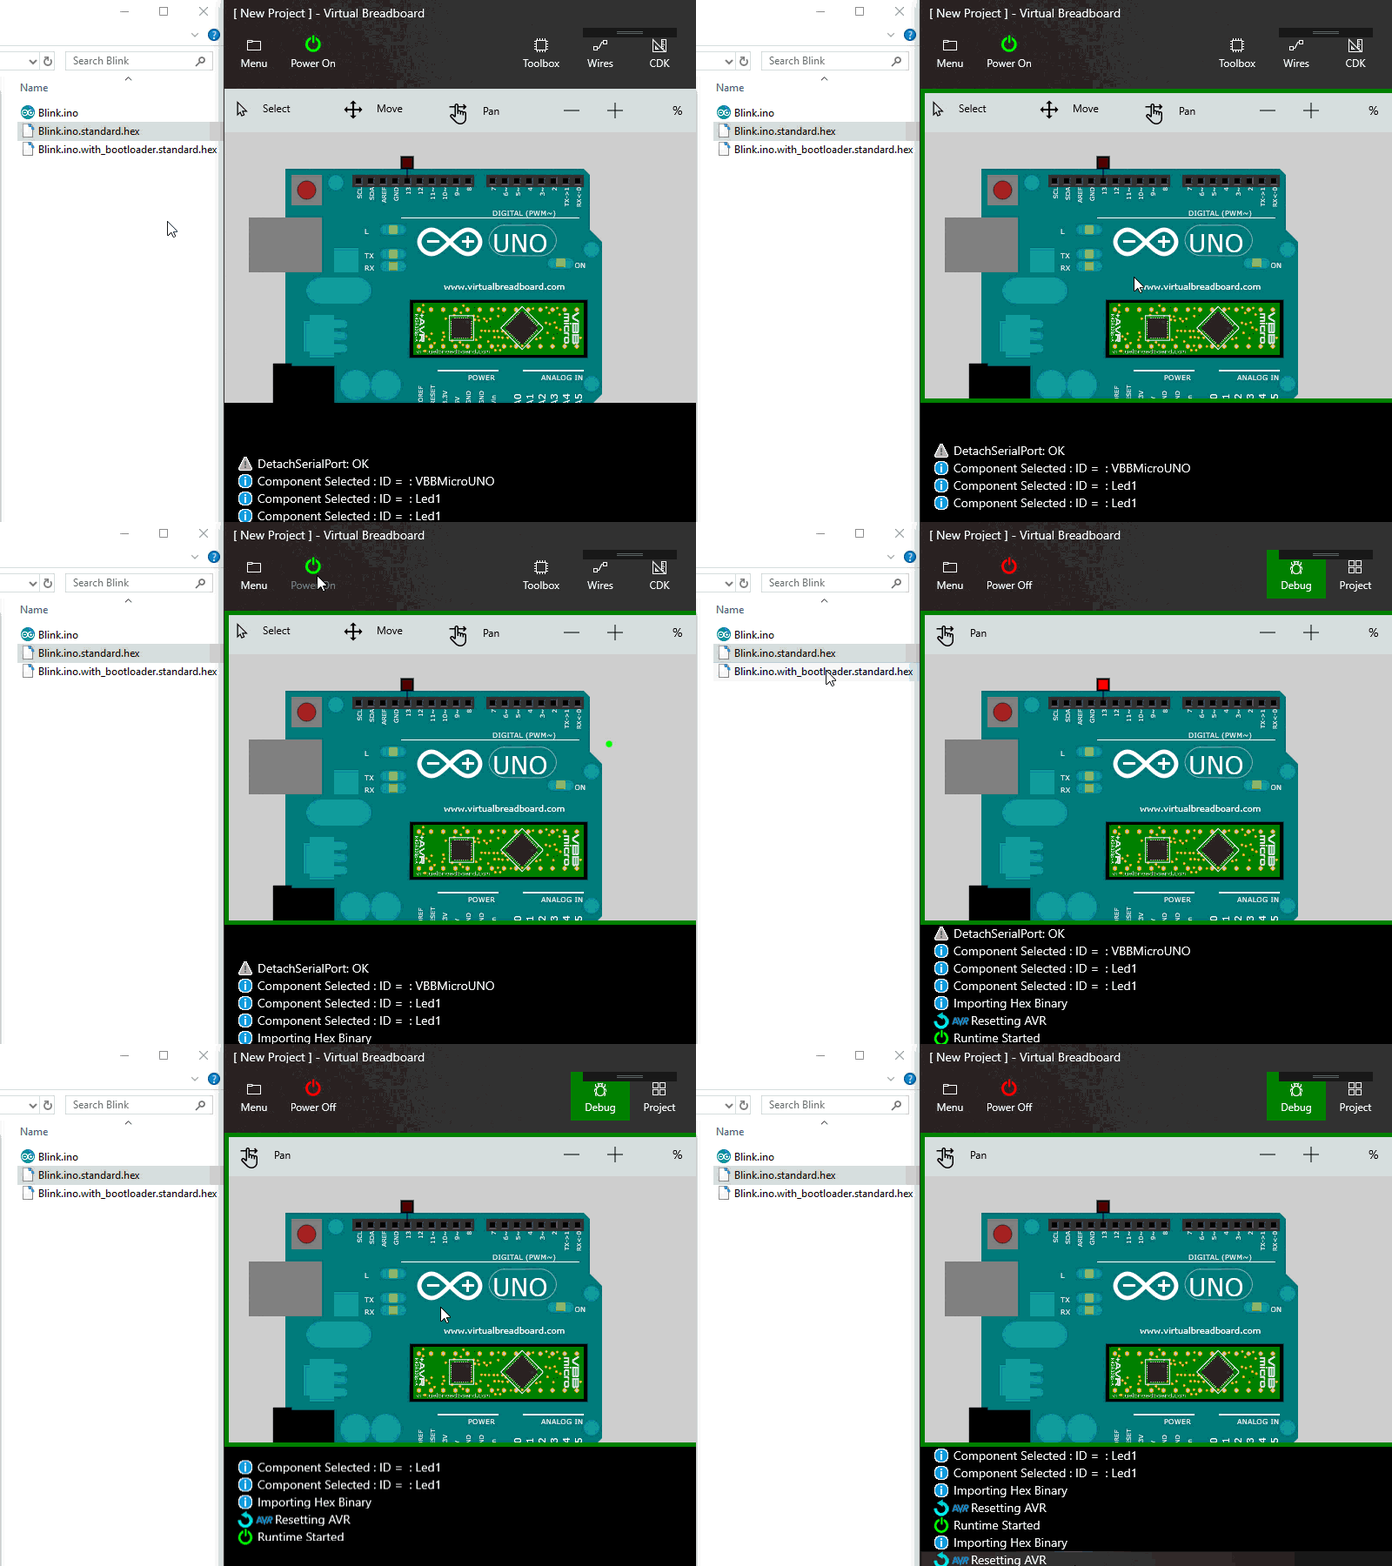
To update the embedded program you drag and drop the HEX file from your Arduino project folder onto the Virtual Arduino. You can also drag and drop during runtime without having to restart the simulation.
To test the Blink program :
- Drag and Drop the HEX file from the Sketch Folder to the Virtual Arduino UNO
- Click the Power On Button to start the simulation
- Optionally Drag and Drop the HEX file to update the program while running
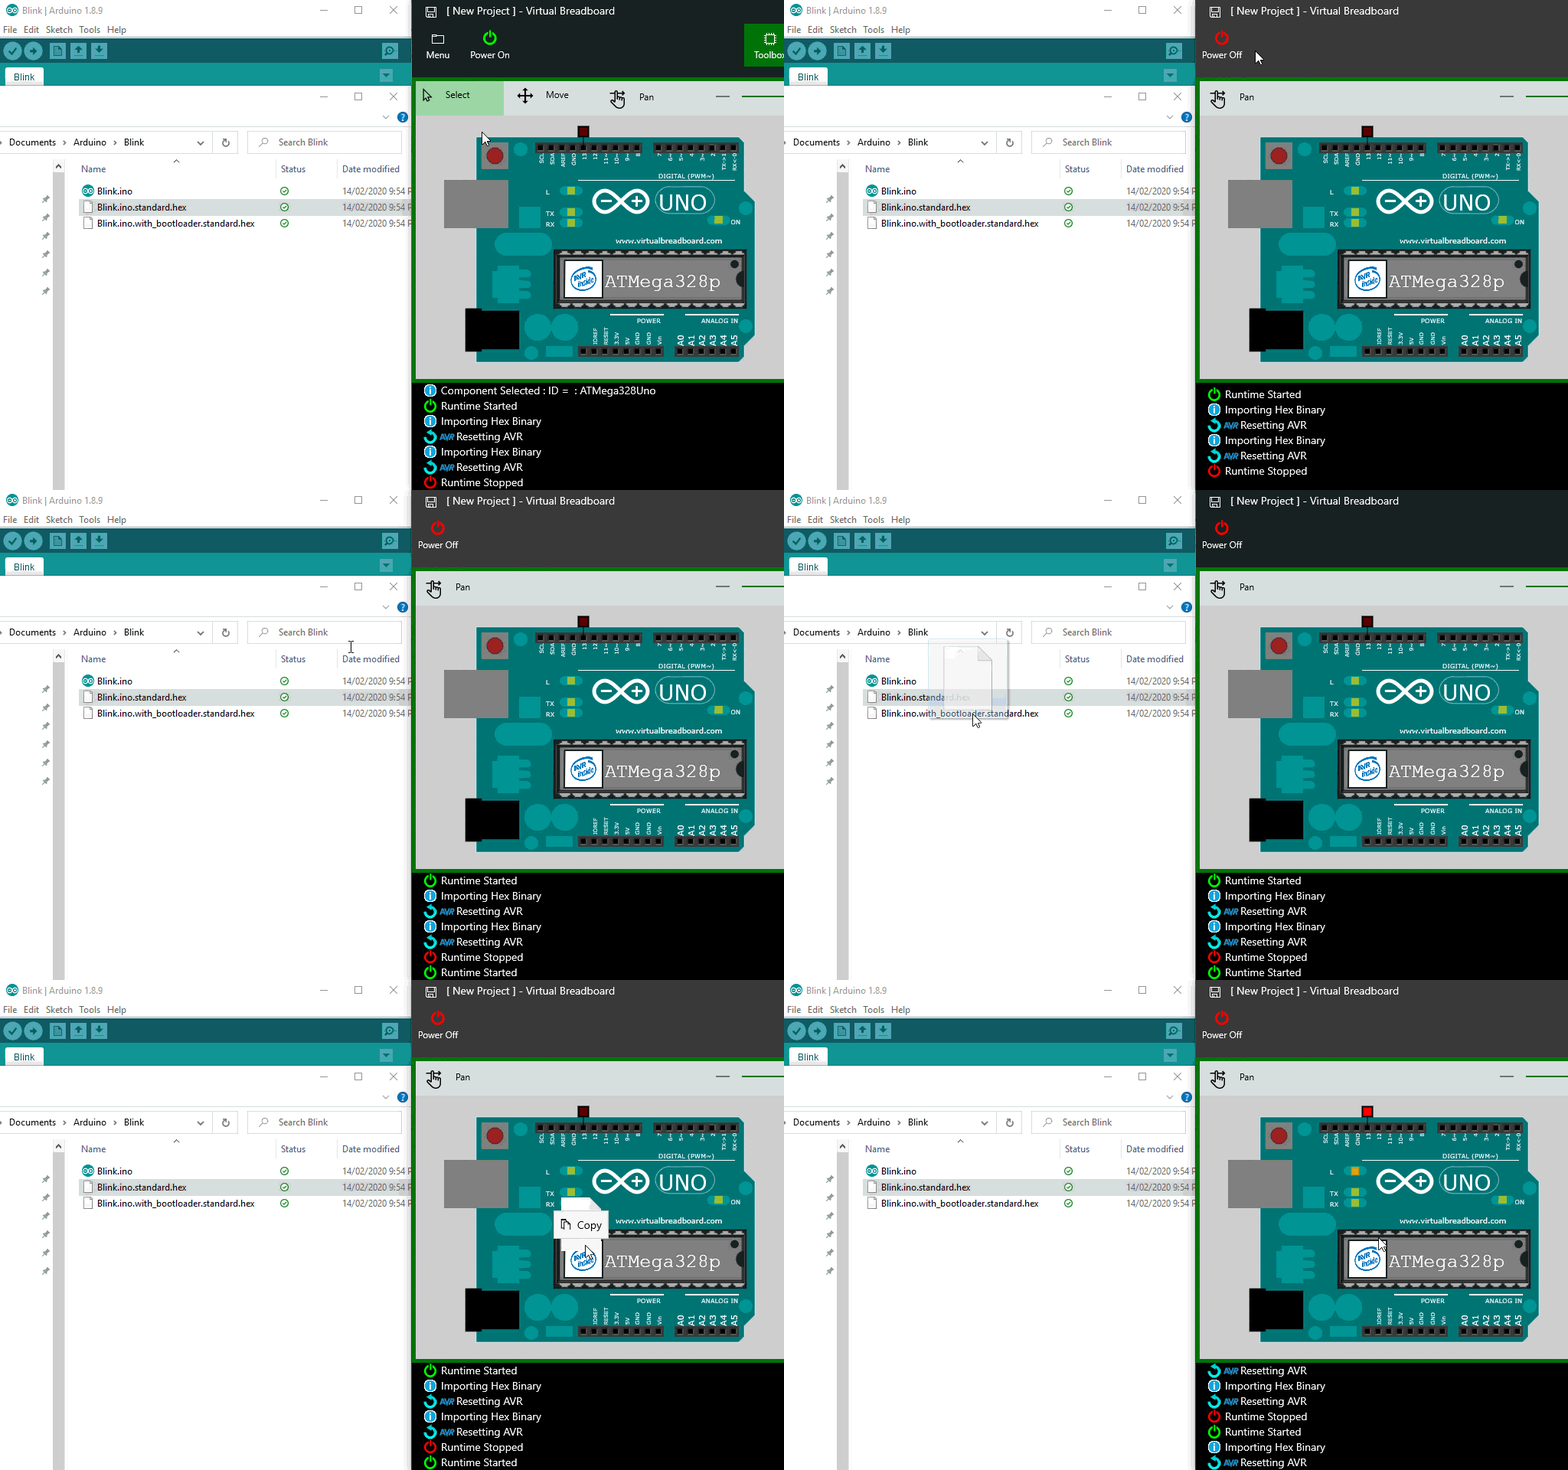
Congratulations, you've successfully built and run your first Virtual Arduino program in a Virtual Breadboard circuit! !
